top button
Flag Notify
    Connect to us
      Site Registration

Site Registration

Describe C# Interface

0 votes
178 views

An interface in C# contains only the declaration of the methods, properties, and events, but not the implementation. It is left to the class that implements the interface by providing implementation for all the members of the interface. Interface makes it easy to maintain a program.

In C#, an interface can be defined using the interface keyword. For example, the following is a simple interface for a logging string message:

Interface Declaration:

interface ILog
{
    void Log(string msgToLog);
}

Now, different classes can implement ILog by providing an implementation of the Log() method, for example, the ConsoleLog class logs the string on the console whereas FileLog logs the string into a text file.

Implement interface using- : <interface name > syntax.

Interface implementation Example:

class ConsoleLog: ILog
{
    public void Log(string msgToPrint)
    {
        Console.WriteLine(msgToPrint);
    }
}

class FileLog :ILog
{
    public void Log(string msgToPrint)
    {
            File.AppendText(@"C:\Log.txt").Write(msgToPrint);
    }
}

Now, you can instantiate an object of either the ConsoleLog or FileLog class:

C#:

ILog log = new ConsoleLog();

//Or 

ILog log = new FileLog();

Explicit Implementation:

You can implement interface explicitly by prefixing interface name with method name, as below:

C#:

class ConsoleLog: ILog
{
    public void ILog.Log(string msgToPrint) // explicit implementation
    {
        Console.WriteLine(msgToPrint);
    }
}

Explicit implementation is useful when class is implementing multiple interface thereby it is more readable and eliminates the confusion. It is also useful if interfaces have same method name coincidently.

Points to Remember :

  1. An Interface only contains declarations of method, events & properties.
  2. An Interface can be implement implicitly or explicitly.
  3. An Interface cannot include private members. All the members are public by default.
posted Feb 2, 2017 by Shivaranjini

  Promote This Article
Facebook Share Button Twitter Share Button LinkedIn Share Button


Related Articles

C# includes following standard IO (Input/Output) classes to read/write from different sources like a file, memory, network, isolated storage, etc.

Stream: System.IO.Stream is an abstract class that provides standard methods to transfer bytes (read, write, etc.) to the source. It is like a wrapper class to transfer bytes. Classes that need to read/write bytes from a particular source must implement the Stream class.

The following classes inherits Stream class to provide functionality to Read/Write bytes from a particular source:

FileStream reads or writes bytes from/to a physical file whether it is a .txt, .exe, .jpg or any other file. FileStream is derived from the Stream class.

MemoryStream: MemoryStream reads or writes bytes that are stored in memory.

BufferedStream: BufferedStream reads or writes bytes from other Streams to improve the performance of certain I/O operations.

NetworkStream: NetworkStream reads or writes bytes from a network socket.

PipeStream: PipeStream reads or writes bytes from different processes.

CryptoStream: CryptoStream is for linking data streams to cryptographic transformations.

The following diagram shows the hierarchy of stream classes:

Stream Classes Hierarchy

Readers and Writers:

StreamReader: StreamReader is a helper class for reading characters from a Stream by converting bytes into characters using an encoded value. It can be used to read strings (characters) from different Streams like FileStream, MemoryStream, etc.

StreamWriter: StreamWriter is a helper class for writing a string to a Stream by converting characters into bytes. It can be used to write strings to different Streams such as FileStream, MemoryStream, etc.

BinaryReader: BinaryReader is a helper class for reading primitive datatype from bytes.

BinaryWriter: BinaryWriter writes primitive types in binary.

Stream IO

The above image shows that FileStream reads bytes from a physical file and then StreamReader reads strings by converting those bytes to strings. In the same way, StreamWriter takes a string and converts it into bytes and writes to FileStream and then FileStream writes the bytes to a physical file. So FileStream deals with bytes where as StreamReader & StreamWriter deals with strings

Points to Remember :

  1. Stream is an abstract class for transfering bytes from different sources. It is base class for all other class that reads\writes bytes to different sources.
  2. FileStream class provides reading and writing functionality of bytes to physical file.
  3. Reader & writer classes provides functionality to read bytes from Stream classes (FileStream, MemoryStream etc) and converts bytes into appropriate encoding.
  4. StreamReader provides a helper method to read string from FileStream by converting bytes into strings. StreamWriter provides a helper method to write string to FileStream by converting strings into bytes.
READ MORE

An Indexer is a special type of property that allows a class or structure to be accessed the same way as array for its internal collection. It is same as property except that it defined with this keyword with square bracket and paramters.

Syntax:

Public <return type> this[<parameter type> index]
{
    Get{
        // return the value from the specified index
    }
    Set{
        // set values at the specified index
    }
}

The following example shows how to use indexer in the custom class.

Example: Indexer

class StringDataStore
{
    
    private string[] strArr = new string[10]; // internal data storage

    public StringDataStore()
    {

    }

    public string this[int index]
    {
        get
        {
            if (index < 0 &&  index >= strArr.Length)
                throw new IndexOutOfRangeException("Cannot store more than 10 objects");

            return strArr[index];
        }

        set
        {
            if (index < 0 &&  index >= strArr.Length)
                throw new IndexOutOfRangeException("Cannot store more than 10 objects");

            strArr[index] = value;
        }
    }
}

class Program
{
    static void Main(string[] args)
    {
        StringDataStore strStore = new StringDataStore();

        strStore[0] = "One";
        strStore[1] = "Two";
        strStore[2] = "Three";
        strStore[3] = "Four";
        
        for(int i = 0; i < 10 ; i++)
            Console.WriteLine(strStore[i]);
    }
}

Output:

One
Two
Three
Four

In the above example, StringDataStore class implements an indexer for its internal string array. So now, object of StringDataStore can be used like an array to add or retrive string data. We have used string array in the above example, you can also you any collection type as per your requirement.

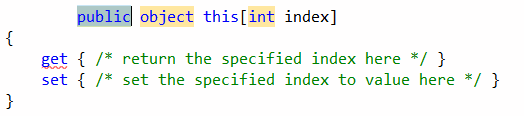
The array operator [] is nothing but an indexer implemented in all the data type in C#. For example, string[] is an indexer in the String class.

Override Indexer:

You can override an indexer by having different index types. The following example shows how an indexer can be of int type as well as string type.

Example: Indexer

class StringDataStore
{
    
    private string[] strArr = new string[10]; // internal data storage

    public StringDataStore()
    {

    }

    public string this[int index]
    {
        get
        {
            if (index < 0 &&  index >= strArr.Length)
                throw new IndexOutOfRangeException("Cannot store more than 10 objects");

            return strArr[index];
        }

        set
        {
            if (index < 0 &&  index >= strArr.Length)
                throw new IndexOutOfRangeException("Cannot store more than 10 objects");

            strArr[index] = value;
        }
    }

    public string this[string name]
    {
        get
        {
            foreach (string str in strArr){
                    if(str.ToLower() == name.ToLower())        
                        return str;
                    }
                    
                return null;
        }
    }
}

class Program
{
    static void Main(string[] args)
    {
        StringDataStore strStore = new StringDataStore();

        strStore[0] = "One";
        strStore[1] = "Two";
        strStore[2] = "Three";
        strStore[3] = "Four";
        
        Console.WriteLine(strStore["one"]);
        Console.WriteLine(strStore["two"]);
        Console.WriteLine(strStore["Three"]);
        Console.WriteLine(strStore["FOUR"]);
    }
}

Output:

One
Two
Three
Four

Insert Indexer Code snippet in VisualStudio:

Vsual studio provides shortcut way to insert a code snippet for an indexer so that you don't have to write entire syntax manually. To insert a snippet for an indexer in Visual Studio, write idexer and press tab or do right click (or Ctrl + K,S) -> select "Insert Snippet.." -> select "Visual C#.." -> select "indexer".

Indexer snippet

Points to Remember :

  1. An indexer is same as property except that it defined with this keyword with square bracket that takes paramter.
  2. Indexer can be override by having different types of parameters.
  3. Ref and out parameter with the indexer is not supported.
  4. Indexer can be included as an interface member.
  5. Use code snippet to insert indexer syntax automatically in the visual studio.
READ MORE

The List<T> collection is the same as an ArrayList except that List<T> is a generic collection whereas ArrayList is a non-generic collection.

List<T> can be initialized in the following two ways.

Example: List<T> Initialization

List<int> intList = new List<int>();

//Or

IList<int> intList = new List<int>();

In the above example, the first statement uses List type variable, whereas the second statement uses IList type variable to initialize List. List<T> is a concreate implementation of IList<T> interface. In the object-oriented programming, it is advisable to program to interface rather than concreate class. So use IList<T> type variable to create an object of List<T>.

List<T> includes more helper methods than IList<T> interface. The table shown below lists important properties and methods of List<T>, which are initialized using a List<T>:

PropertyUsage
ItemsGets or sets the element at the specified index
CountReturns the total number of elements exists in the List<T>
MethodUsage
AddAdds an element at the end of a List<T>.
AddRangeAdds elements of the specified collection at the end of a List<T>.
BinarySearchSearch the element and returns an index of the element.
ClearRemoves all the elements from a List<T>.
ContainsChecks whether the speciied element exists or not in a List<T>.
FindFinds the first element based on the specified predicate function.
ForeachIterates through a List<T>.
InsertInserts an element at the specified index in a List<T>.
InsertRangeInserts elements of another collection at the specified index.
RemoveRemoves the first occurence of the specified element.
RemoveAtRemoves the element at the specified index.
RemoveRangeRemoves all the elements that match with the supplied predicate function.
SortSorts all the elements.
TrimExcessSets the capacity to the actual number of elements.
TrueForAllDetermines whether every element in the List<T> matches the conditions defined by the specified predicate.

Add Elements into List:

Use the Add() method to add an element into a List collection. The following example adds int value into a List<T> of int type.

Add() signature: void Add(T item)

Example: Adding elements into List

IList<int> intList = new List<int>();
intList.Add(10);
intList.Add(20);
intList.Add(30);
intList.Add(40);

IList<string> strList = new List<string>();
strList.Add("one");
strList.Add("two");
strList.Add("three");
strList.Add("four");
strList.Add(null);
strList.Add(null);

IList<Student> studentList = new List<Student>();
studentList.Add(new Student());

You can also add elements at the time of initialization using object initializer syntax as below:

Example: Add elements using object initializer syntax

IList<int> intList = new List<int>(){ 10, 20, 30, 40 };

//Or

IList<Student> studentList = new List<Student>() { 
                new Student(){ StudentID=1, StudentName="Bill"},
                new Student(){ StudentID=2, StudentName="Steve"},
                new Student(){ StudentID=3, StudentName="Ram"},
                new Student(){ StudentID=1, StudentName="Moin"}
            };

AddRange:

The AddRange() method adds all the elements from another collection.

AddRange() signature: void AddRange(IEnumerable<T> collection)

Example: AddRange

IList<int> intList1 = new List<int>();
intList1.Add(10);
intList1.Add(20);
intList1.Add(30);
intList1.Add(40);

List<int> intList2 = new List<int>();

intList2.AddRange(intList1);

Note :The AddRange() method will only be applicable if you initialized with a List<T> variable. IList<T> doesn't include the AddRange() method.

Access List collection:

Use a foreach or for loop to iterate a List<T> collection.

Example: Accessing List

List<int> intList = new List<int>() { 10, 20, 30 };

intList.ForEach(el => Console.WriteLine(el));

If you have initialized the List<T> with an IList<T> interface then use seperate foreach statement with implicitly typed variable:

Example: Accessing List

IList<int> intList = new List<int>() { 10, 20, 30, 40 };

foreach (var el in intList)
        Console.WriteLine(el);

Output:

10 
20 
30 
40

Access individual items by using an indexer (i.e., passing an index in square brackets):

Example: Accessing List

IList<int> intList = new List<int>() { 10, 20, 30, 40 };

int elem = intList[1]; // returns 20

Use the Count property to get the total number of elements in the List.

Example: Access List elements

IList<int> intList = new List<int>() { 10, 20, 30, 40 };

Console.Write("Total elements: {0}", intList.Count);

Output:

Total elements: 4

Use for loop to access list as shown below:

Example: Accessing List using for loop example:

IList<int> intList = new List<int>() { 10, 20, 30, 40 };

for (int i = 0; i < intList.Count; i++)
        Console.WriteLine(intList[i]);


Output:

10 
20 
30 
40

List<T> implements IList<T>, so List<T> implicitly type cast to IList<T>.

Example: Access List

static void Print(IList<string> list)
{
    Console.WriteLine("Count: {0}", list.Count);
    foreach (string value in list)
    {
        Console.WriteLine(value);
    }
}

static void Main(string[] args)
{

    string[] strArray = new string[2];
    strArray[0] = "Hello";
    strArray[1] = "World";
    Print(strArray);

    List<string> strList = new List<string>();
    strList.Add("Hello");
    strList.Add("World");
    Print(strList);
}

Output:

Hello 
World 
Hello 
World

Insert into List:

The Insert() method inserts an element into a List<T> collection at the specified index.

Insert() signature:void Insert(int index, T item);

Example: Insert elements into List

IList<int> intList = new List<int>(){ 10, 20, 30, 40 };

intList.Insert(1, 11);// inserts 11 at 1st index: after 10.

foreach (var el in intList)
        Console.Write(el);

Output:

10 
11 
20 
30 
40

Remove Elements from List:

The Remove() and RemoveAt() methods remove items from a List<T> collection.

Remove() signature: bool Remove(T item)

RemoveAt() signature: void RemoveAt(int index)

Example: Remove elements from List

IList<int> intList = new List<int>(){ 10, 20, 30, 40 };

intList.Remove(10); // removes the 10 from a list

intList.RemoveAt(2); //removes the 3rd element (index starts from 0)

foreach (var el in intList)
    Console.Write(el);

Output:

20 
30

TrueForAll:

TrueForAll() is a method of the List<T> class. It returns true if the specified condition turns out to be true, otherwise false. Here, the condition can be specified as a predicate type deligate or lambda expression.

TrueForAll() signature: bool TrueForAll(Predicate<T> match)

Example: TrueForAll()

List<int> intList = new List<int>(){ 10, 20, 30, 40 };

bool res = intList.TrueForAll(el => el%2 == 0);// returns true

The following example uses isPositiveInt() as a Predicate<int> type delegate as a parameter to TrueForAll.

Example: TrueForAll()

static bool isPositiveInt(int i)
{
    return i > 0;
}

static void Main(string[] args)
{
    List<int> intList = new List<int>(){10, 20, 30, 40};

    bool res = intList.TrueForAll(isPositiveInt);

}

Points to Remember :

  1. List<T> stores elements of the specified type and it grows automatically.
  2. List<T> can store multiple null and duplicate elements.
  3. List<T> can be assigned to IList<T> or List<T> type of variable. It provides more helper method When assigned to List<T> variable
  4. List<T> can be access using indexer, for loop or foreach statement.
  5. LINQ can be use to query List<T> collection.
  6. List<T> is ideal for storing and retrieving large number of elements.
READ MORE

You have learned how to perform different tasks on physical files using static File class in the previous section. Here, we will use FileInfo class to perform read/write operation on physical files.

The FileInfo class provides the same functionality as the static File class but you have more control on read/write operations on files by writing code manually for reading or writing bytes from a file.

Important properties and methods of FileInfo:

PropertyUsage
DirectoryGets an instance of the parent directory.
DirectoryNameGets a string representing the directory's full path.
ExistsGets a value indicating whether a file exists.
ExtensionGets the string representing the extension part of the file.
FullNameGets the full path of the directory or file.
IsReadOnlyGets or sets a value that determines if the current file is read only.
LastAccessTimeGets or sets the time the current file or directory was last accessed
LastWriteTimeGets or sets the time when the current file or directory was last written to
LengthGets the size, in bytes, of the current file.
NameGets the name of the file.
MethodUsage
AppendTextCreates a StreamWriter that appends text to the file represented by this instance of the FileInfo.
CopyToCopies an existing file to a new file, disallowing the overwriting of an existing file.
CreateCreates a file.
CreateTextCreates a StreamWriter that writes a new text file.
DecryptDecrypts a file that was encrypted by the current account using the Encrypt method.
DeleteDeletes the specified file.
EncryptEncrypts a file so that only the account used to encrypt the file can decrypt it.
GetAccessControlGets a FileSecurity object that encapsulates the access control list (ACL) entries for a specified file.
MoveToMoves a specified file to a new location, providing the option to specify a new file name.
OpenOpens a in the specified FileMode.
OpenReadCreates a read-only FileStream.
OpenTextCreates a StreamReader with UTF8 encoding that reads from an existing text file.
OpenWriteCreates a write-only FileStream.
ReplaceReplaces the contents of a specified file with the file described by the current FileInfo object, deleting the original file, and creating a backup of the replaced file.
ToStringReturns a path as string.

The following example shows how to read bytes from a file manually and then convert them to a string using UTF8 encoding:

//Create object of FileInfo for specified path            
FileInfo fi = new FileInfo(@"D:\DummyFile.txt");

//Open file for Read\Write
FileStream fs = fi.Open(FileMode.OpenOrCreate, FileAccess.ReadWrite, FileShare.ReadWrite); 

//create byte array of same size as FileStream length
byte[] fileBytes = new byte[fs.Length];

//define counter to check how much butes to read. Decrease the counter as you read each byte
int numBytesToRead = (int)fileBytes.Length;

//Counter to indicate number of bytes already read
int numBytesRead = 0;

//iterate till all the bytes read from FileStream
while (numBytesToRead > 0)
{
    int n = fs.Read(fileBytes, numBytesRead, numBytesToRead);
    if (n == 0)
        break;

    numBytesRead += n;
    numBytesToRead -= n;
}

//Once you read all the bytes from FileStream, you can convert it into string using UTF8 encoding
string filestring = Encoding.UTF8.GetString(fileBytes);


As you have seen in the above code, you have to write lot of code for reading/writing a string from a FileSream. The same read/write operation can be done easily using StreamReader and StreamWriter.

The following example shows how StreamReader makes it easy to read strings from a file:

//Create object of FileInfo for specified path            
FileInfo fi = new FileInfo(@"D:\DummyFile.txt");
        
//Open file for Read\Write
FileStream fs = fi.Open(FileMode.OpenOrCreate, FileAccess.Read , FileShare.Read); 

//Create object of StreamReader by passing FileStream object on which it needs to operates on
StreamReader sr = new StreamReader(fs);

//Use ReadToEnd method to read all the content from file
string fileContent = sr.ReadToEnd();

//Close StreamReader object after operation
sr.Close();
fs.Close();

Notice that fi.Open() has three parameters: The first parameter is FileMode for creating and opening a file if it does not exist; the second parameter, FileAccess, is to indicate a Read operation; and the third parameter is to share the file for reading with other users while the file is open.

The following example shows how StreamWriter makes it easy to write strings to a File:

Example: Write texts to file using StreamWriter

//Create object of FileInfo for specified path            
FileInfo fi = new FileInfo(@"D:\DummyFile.txt");
        
//Open file for Read\Write
FileStream fs = fi.Open(FileMode.OpenOrCreate, FileAccess.Write, FileShare.Read ); 

//Create StreamWriter object to write string to FileSream
StreamWriter sw = new StreamWriter(fs);
sw.WriteLine("Another line from streamwriter");
sw.Close();

Read and Write operations are not possible on the same FileStream object simultaneously. If you are already reading from a file, create a separate FileStream object to write to the same file, as shown below:

//Create FileInfo object for DummyFile.txt
FileInfo fi = new FileInfo(@"D:\DummyFile.txt");

//open DummyFile.txt for read operation
FileStream fsToRead = fi.Open(FileMode.OpenOrCreate, FileAccess.ReadWrite , FileShare.ReadWrite); 

//open DummyFile.txt for write operation
FileStream fsToWrite = fi.Open(FileMode.OpenOrCreate, FileAccess.ReadWrite, FileShare.ReadWrite); 
          
//get the StreamReader

StreamReader sr = new StreamReader(fsToRead);
//read all texts using StreamReader object
string fileContent = sr.ReadToEnd();
sr.Close();

//get the StreamWriter
StreamWriter sw = new StreamWriter(fsToWrite);
//write some text using StreamWriter
sw.WriteLine("Another line from streamwriter");
sw.Close();

//close all Stream objects
fsToRead.Close();
fsToWrite.Close();

Thus you can use FileInfo, StreamReader and StreamWriter class to read/write contents from physical file.

Points to Remember :

  1. Use FileInfo class to perform operations on physical files manually.
  2. Use StreamReader & StreamWriter class with FileInfo for reading or writing string from physical file.
READ MORE
...