In the previous part, I explained basic selectors and basic filters. Now let's try to understand attribute selectors, content filters, child filters and visibility filters.
Understanding Attribute Selectors
Attribute selectors allow you to match attributes of HTML elements with certain criteria. It is not just "equal to" kind of matching but several other options are also available as outlined in the table below. The usage of attribute selector takes the following general form :
<element_name>[<attribute_name> <operator> <value_to_match>]
e.g.
a[href = "hello"]
| Attribute Selector | Operator | Description |
| Attribute Equals Selector | = | Selects element whose specified attribute value exactly equals with a specific string value. |
| Attribute Not Equal Selector | != | Selects element whose specified attribute value doesn't match with a specific string value OR the specified attribute itself is missing. |
| Attribute Starts With Selector | ^= | Selects element whose specified attribute value begins with a specific value. |
| Attribute Ends With Selector | $= | Selects element whose specified attribute value ends with certain string value. |
| Attribute Contains Selector | *= | Selects element whose specified attribute value contains a specific string. |
| Attribute Contains Word Selector | ~= | Selects element whose specified attribute value contains a specific string as a whole word i.e. the value is separated by white space. |
| Attribute Contains Prefix Selector | |= | Selects element whose specified attribute value matches exactly equal to the specified value or that starts with the specified value followed by a - (hyphen). |
| Has Attribute Selector | | Selects element if a specified attribute is present. |
| Multiple Attribute Selector | | Combination of multiple attribute filters |
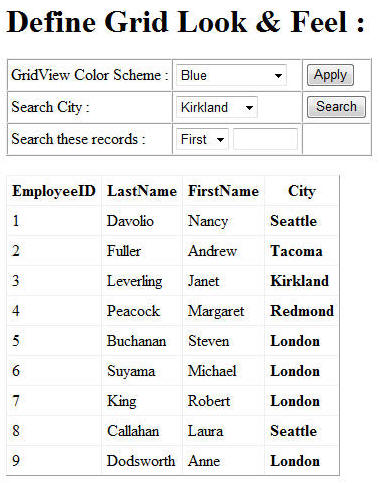
Now let's develop a simple web form that makes use of some of these attribute selectors. Our web form will look like this :
The web form contains a GridView with a list of download links. The downloads include products, white papers and components. At the top of the web form there is a DropDownList that allows you to filter the download links based on the category (product, white paper, component etc.). The checkbox governs whether the links are opened in the same browser window or in a separate window.
The data displayed in the grid is not coming from any database. Rather it is coming from an object collection. The code behind of the web form defines a class named Download as shown below :
public class Download
{
    public Download()
    {
    }
    public Download(string title,string url)
    {
        this.Title = title;
        this.URL = url;
    }
    public string Title { get; set; }
    public string URL { get; set; }
}
The Download class contains two public properties viz. Title and URL. The overloaded constructor allows you to quickly instantiate Download instances.
The actual data binding work happens in Page_Load event handler.
protected void Page_Load(object sender, EventArgs e)
{
    List<Download> items = new List<Download>();
    items.Add(new Download("SQL Server Backup Tool",
     "products/Product1.aspx"));
    items.Add(new Download("Visual Studio Add-In",
     "products/Product2.aspx"));
    items.Add(new Download("Understanding DNA Architecture",
     "Paper-Topic1.aspx"));
    items.Add(new Download("In-depth XML and JSON Serialization",
     "Paper-Topic2.aspx"));
    items.Add(new Download("Data Access Component",
     "Component1-comp.aspx"));
    items.Add(new Download("Mass Mailing Component",
     "Component2-comp.aspx"));

    GridView1.DataSource = items;
    GridView1.DataBind();
}
Here, you just create a generic List and fill it with some Download instances. You then set the DataSource of the grid to this List and call DataBind() method. Notice the URLs above carefully because later your use of attribute filters will be based on them.
The GridView consists of a single HyperLinkField whose configuration is shown below :
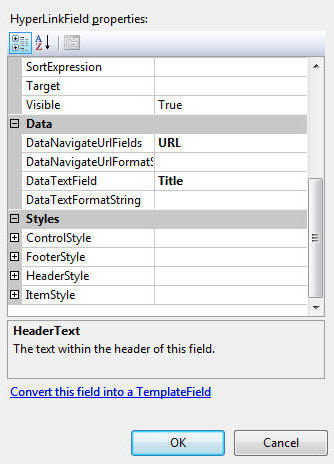
The DataNavigateUrlFields property is set to URL and DataTextField property is set to Title.
Ok. That completes the server side part. Now let's see the jQuery part.
The complete jQuery code behind the functionality that we desire is shown below :
$(document).ready(function() {
    $("#DropDownList1").change(function() {
        switch ($("#DropDownList1").val()) {
            case "A":
                $("#GridView1 tr a").css("visibility", "visible");
                $("#GridView1 tr a").css("display", "block");
                break;
            case "P":
                $("#GridView1 tr a[href *= 'products/']").
                 css("visibility", "visible").css("display", "block");
                $("#GridView1 tr a[href |= 'Paper']").
                 css("visibility", "hidden").css("display", "none");
                $("#GridView1 tr a[href $= '-comp.aspx']").
                 css("visibility", "hidden").css("display", "none");
                break;
            case "WP":
                $("#GridView1 tr a[href *= 'products/']").
                 css("visibility", "hidden").css("display", "none");
                $("#GridView1 tr a[href |= 'Paper']").
                 css("visibility", "visible").css("display", "block");
                $("#GridView1 tr a[href $= '-comp.aspx']").
                 css("visibility", "hidden").css("display", "none");
                break;
            case "C":
                $("#GridView1 tr a[href *= 'products/']").
                 css("visibility", "hidden").css("display", "none");
                $("#GridView1 tr a[href |= 'Paper']").
                 css("visibility", "hidden").css("display", "none");
                $("#GridView1 tr a[href $= '-comp.aspx']").
                 css("visibility", "visible").css("display", "block");
                break;
        }
    }),
    $("#CheckBox1").change(function() {
        if ($("input[name='CheckBox1']").is(":checked")) {
            $("#GridView1 a:visible").attr("target", "_blank");
        }
        else {
            $("#GridView1 a:visible").attr("target", "_self");
        }
    })

})
Let's examine the code.
The code essentially handles change events of DropDownList1 and CheckBox1 controls. The change event handler of DropDownList control consists of a JavaScript switch statement that checks for the selected value.
If the selected value is "A" i.e. show all downloads then you set the visibility CSS property of all hyperlinks to visible. This way it ensures that all types of downloads (products, components, white papers etc.) are shown in the grid. This code should be familiar to you as we used element selectors and css() function in the past examples.
If the selected value is "P" i.e. show only products then you use Attribute Contains selector (*=) to match all the anchor elements whose href attribute contains string "products/". Our URLs are such that only two entries match this criteria and you then set visibility of those links to visible.
We then use Attribute Contains Prefix selector (|=) to select white paper downloads. Notice that our URLs for white papers begin with "Paper-" but we specified only "Paper" in the selector because Attribute Contains Prefix selector selects values that are equal to OR begin with specified value plus hyphen (-). The selected links are kept hidden by setting their visibility property to hidden and display property to none. Remember that setting display to none is also necessary. If you don't set the display to none then the hyperlinks will be hidden but the empty grid rows will be still visible.
Finally, we filter component related links using Attribute Ends With selector ($=) and hide them from the user as with white paper links.
Notice how we have used css() function calls in a "chain" like fashion. It is important to remember that both of the css() calls are invoked on the return value of the selector. That means both calls are working on the same resultant elements. This is bit different than most of the programming languages such as C#. Consider the following C# code :
objEmployee.GetSalary().ToString()
What happens here? First GetSalary() method is invoked on objEmployee. ToString() method is then invoked on the return value of GetSalary() method. jQuery chaining is bit different. That is how all the calls to css() function are invoked on the returned set of element selector.
The other cases of the switch block i.e. "WP" and "C" are similar to the case we just discussed. The only difference is that they show the respective links and hide the remaining ones.
The CheckBox change event handler makes use of some other jQuery selectors. First, it filters input element whose name attribute is exactly equal to CheckBox1 using Attribute Equals selector. The is() filter checks if the checkbox is checked. Notice the use of Form selector :checked (I will cover Form selectors in detail in later parts) that returns all the checked elements. If the checkbox is checked we set target attribute of all the visible hyperlinks. The visibility filter :visible returns elements that are currently visible. The attr() method allows you to set value of an attribute and accepts two parameters. The first parameter is the name of the attribute (target in our case) and the second parameter is its value.
That's it. Run the web form and see how our jQuery code shows/hides the grid rows based on the DropDownList selection. Also check the behavior with checkbox checked and unchecked.
Understanding Visibility Filters
Visibility filters allow you to select elements based on their visibility. Two visibility selectors are :visible and :hidden. The :visible selector returns all the elements that are visible whereas :hidden selector selects all the elements that are hidden in the browser. In the preceding example you already used :visible selector so I won't cover a separate example for visibility filters.
Understanding Child Filters
Child filters allow you to work with child elements of the selected parent elements. The four selectors of this category are :first-child, :last-child, :nth-child() and :only-child. As the names suggest the :first-child filter returns the first child element, :last-child filters returns the last child element, :nth-child() filter returns a child element at a specified index and :only-child filter returns elements that are the sole child element of their parent.
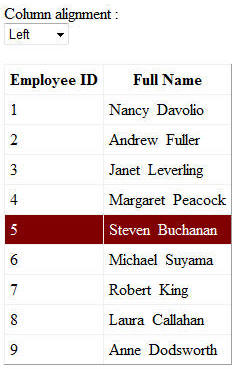
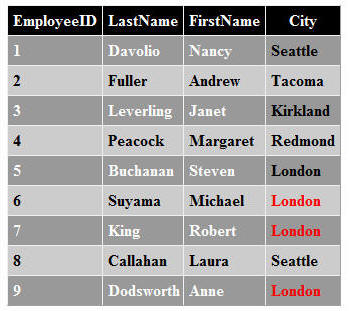
To understand how child filters work you will develop a web form as shown below :
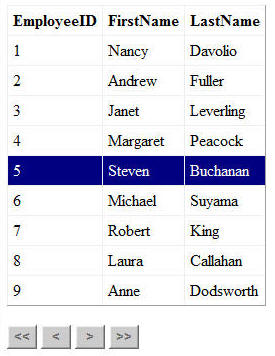
The web form displays records from the Employees table of Northwind database. At the bottom there are four VCR buttons that allow you to navigate through the grid. The highlighted marker moves to an appropriate row as you click on the VCR buttons.
The jQuery code responsible for the said functionality is shown below :
var counter = 1;

$(document).ready(function() {
    $("#Button1").click(function(event) {
        counter = 1;
        $("#GridView1 tbody tr").removeClass("HighlightedRow");
        $("#GridView1 tbody tr:first-child").
addClass("HighlightedRow");
        event.preventDefault();
    })
    ,
    $("#Button2").click(function(event) {
        if (counter > 1) {
            counter--;
        }
        $("#GridView1 tbody tr").removeClass("HighlightedRow");
        $("#GridView1 tbody tr:nth-child(" + counter + ")").
addClass("HighlightedRow");
        event.preventDefault();
    })
    ,
    $("#Button3").click(function(event) {
        if (counter < $("#GridView1 tbody tr").length) {
            counter++;
        }
        $("#GridView1 tbody tr").removeClass("HighlightedRow");
        $("#GridView1 tbody tr:nth-child(" + counter + ")").
addClass("HighlightedRow");
        event.preventDefault();
    })
    ,
    $("#Button4").click(function(event) {
        counter = $("#GridView1 tbody tr").length;
        $("#GridView1 tbody tr").removeClass("HighlightedRow");
        $("#GridView1 tbody tr:last-child").
addClass("HighlightedRow");
        event.preventDefault();
    })

})
The code essentially handles click events of all the VCR buttons. A global JavaScript variable counter keeps track of the "current" row. If you click on the First button (<<) then first <tr> element that is a child of <tbody> element is returned using tr:first-child filter. The returned table row is then applied with HighlightedRow CSS class. Similarly, when you click on Last button (>>) the last row is selected using tr:last-child filter.
The click event handlers of Previous (<) and Next (>) buttons increment or decrement the counter variable as appropriate. The code then uses nth-child() selector by passing the counter variable as the child index. Remember that nth-child takes 1 based index and not 0 based.
The HighlightedRow CSS class used by above code is as follows :
.HighlightedRow
{
background-color:navy;
color:White;
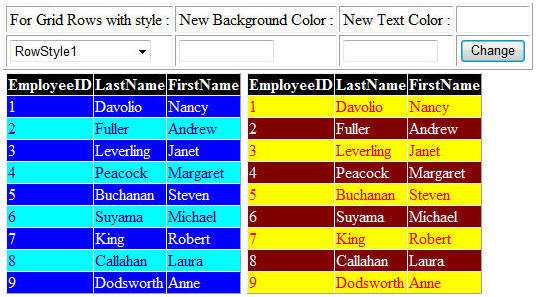
}Understanding Content Filters
Content filters all you to filter elements based on their content. There are four selectors in this category namely :contains(), :empty, :has() and :parent. We used :contains() filter in earlier parts to check whether an element contains certain text. The :empty selector returns all the elements that have no child elements (not even text nodes). The :has() selector returns elements that contain one or more elements matching the specified selector. Finally, the :parent selector is opposite to :empty and returns all the elements that have at least one child (that child can be a text node).
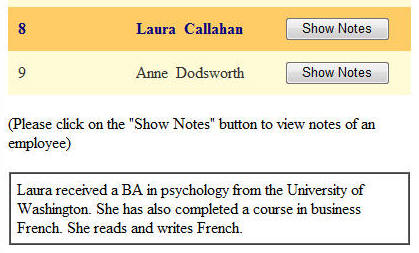
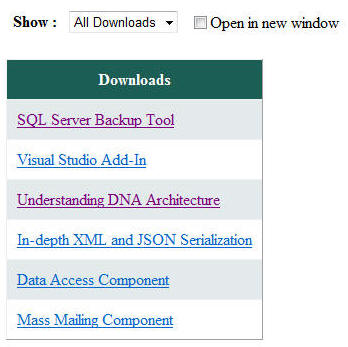
To see some of the above content filters in action we will develop a search web form as shown below :
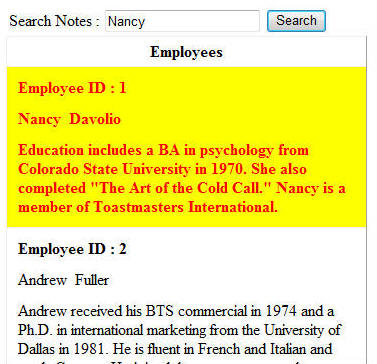
The web form consists of a GridView that displays records from the Employees table. There is a TextBox at the top that accepts a search criteria. The entered text is to be searched only within Notes and not in any other column. The grid consists of a template column as shown below :
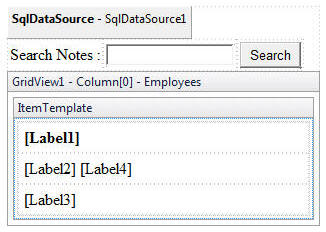
The template column consists of four Label controls. Label1 displays EmployeeID, Label2 and label4 display FirstName and LastName respectively and Label3 displays Notes. Notes being a long text paragraphs we include them in <p> tag so that CSS styling for <p> (if any) gets applied to Notes also.
<td>
<p>
<asp:Label ID="Label3" runat="server"
Text='<%# Eval("Notes") %>'></asp:Label>
</p>
</td>
Now the jQuery part. See the jQuery code below that does the searching using :contains() and :has selectors.
$(document).ready(function() {
$("#Button1").click(function(event) {
$("#GridView1 tr").removeClass("Highlight");
$("#GridView1 tr:has(p:contains(" + $("#TextBox1").val()
+ "))").addClass("Highlight");
event.preventDefault();
})
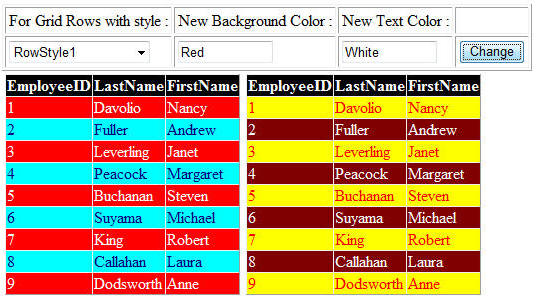
})We are interested to search only notes so we check if the row elements has paragraph elements containing the search criteria as specified in the textbox. If any matching rows are found, Highlight CSS class is applied to them. The Highlight CSS class is shown below :
.Highlight
{
    background-color:yellow;
    color:red;
    font-weight:bold;
}
Because we are restricting our searching only to rows having <p> elements, if you enter Nancy as search criteria the search will be successful as Notes do contain the word Nancy. But if you enter Davolio no row is highlighted even if row containing FirstName and LastName labels contain that word.
So far we have covered majority of jQuery selectors except Form selectors and Hierarchy selectors. In the next part I will cover both of them before going to other areas. Stay tuned!