Introduction
There are developers who write code and then there are developers who write better code. The difference is obvious. Writing good code is skill that not all developers have. This also implies that this skill can be improved. A part of this skill includes ability to refactor the code that you or somebody else has written. VS.NET 2005 includes a set of features that help you in this regards. This article is going to discuss what refactoring is and how VS.NET 2005 helps you to refactor your code.
What is refactoring?
As a developer all of us write code in one or the other language. Often the code we write is not the best piece of software in terms of its organization, arrangement, readability and structure. When we (or somebody else) review our own code we realize that it needs to be improved or even rewritten at certain places. This process of improving our code is called as refactoring. Note that the term refactoring implies that we are improving the code without changing its intended functionality or meaning.
Some of the common refactoring tasks include:
- Changing signature of methods
- Renaming variables
- Creating interfaces out of existing code
- Convert a block of code into a separate method
Refactor menu
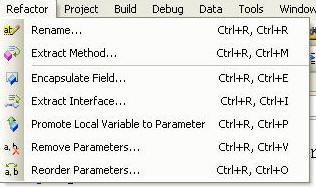
Now comes the interesting part. VS.NET 2005 includes a menu called "Refactor" that helps you to perform many of the common refactoring tasks. The following figure shows the Refactor menu and its items.
Renaming variables, properties and methods
Many times it happens that after writing huge amount of code you feel like changing names of variables, properties and methods involved. Common reason being improved readability. The traditional approach is to use "Find and Replace" option from edit menu. Unfortunately our code is not a work document and invoking "Find and Replace" may not prove useful. Moreover chances of accidentally replacing unintended tokens are high (recollect how often you used Ctrl+Z after that mighty Replace All command). The Rename menu option from the Refactor menu helps you do this task easily.
You need to go the variable or property or method name that you intend to change and select "Rename" menu option. This will open a dialog as shown below:
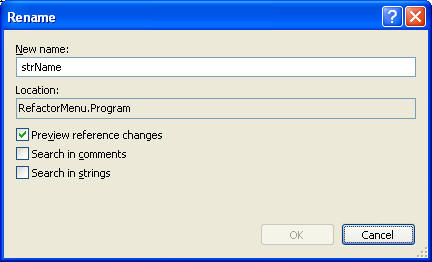
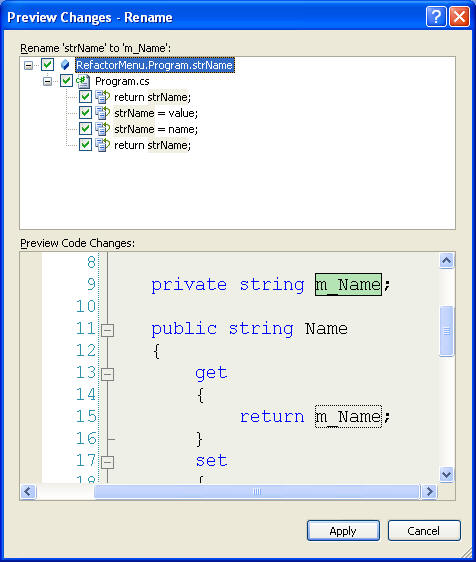
You can enter the new name for the variable, property or method and click OK to change it everywhere. You can also preview the changes before you apply them. The following figure shows the preview dialog. See how you can uncheck the locations where change is going to occur.
Additionally you can control if you want to change the name in comments and string literals.
Extracting a method
Consider a typical scenario. You start coding a lengthy method consisting of some complex sets of algorithms. After completing the method you realize it has become huge and complex enough that other team members can not understand it with ease. Hence, you decide to break it down in multiple small functions. This not only simplifies your code but also improves its readability and maintainability. The "Extract Method" option of Refactor menu does the job for you.
In order to use this menu option you must select a block of code that you want to separate out as a method and then click on the "Extract Method" menu option. The following figure shows the extract method dialog.
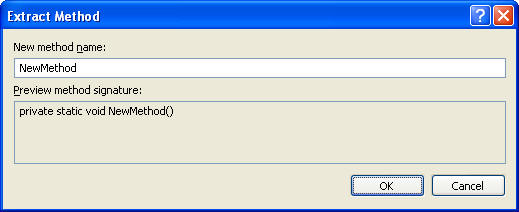
Once you enter the name of the new method to be created and click OK it does two things for you:
Creating properties that wrap class level variables
Let's accept the fact that many developers have habit of exposing class level variables (fields) to the external world. As per object oriented programming one should allow access to variables only through properties or methods. Such circumstances can be dealt with the help of "Encapsulate Field" option of Refactor menu.
Select the class level variable that you want to wrap inside a property and choose the "Encapsulate Field" option. This will open a dialog as shown below:
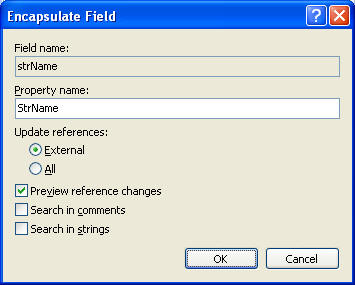
You need to enter the property name and decide if you want to update the references to the variable from outside the class or from outside as well as inside of the class. Just like Rename dialog you can preview the changes before applying.
Extracting interfaces
Sometime it happens that after coding a class you realize that there are going to be other classes bearing similar structure but different implementation. This is a perfect case for interfaces and "Extract Interface" option from Refactor menu does the job for you.
You need to be in the class and select "Extract Interface" to pop up a dialog as shown below:
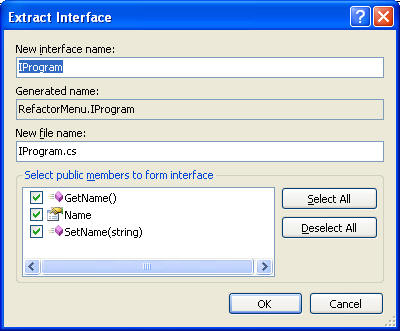
You need to specify the name of the interface, the file name in which to store the interface and the members to be included in the interface. Clicking on OK creates a new file and creates an interface within in. Also, the class from which you extracted the interface is automatically marked to be implementing the interface.
Promoting local variables to method parameters
Another common scenario is converting local variables from a method as method parameters. In this case "Promote local variable to parameter" option of the Refactor menu comes handy. Simply place your custom at the line where you have declared the variable and click on this option. You fill find that the variable now appears as a method parameter and all the calls to the method get updated accordingly. Note that in order for this option to work it is necessary to initialize the variable to some value.
Removing method parameters
They way you may need to promote local variables as method parameters, you may also need to remove some or all method parameters (changes are always unexpected you know). In such cases "Remove Parameters" option from Refactor menu comes handy.
You need to be inside the method whose parameters are to be removed and select "Remove Parameters" option. This will bring a dialog as shown below:
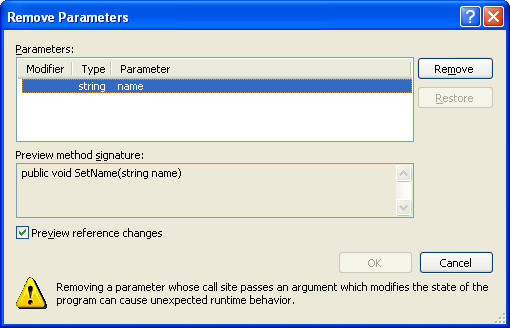
You can then remove the required parameters. The good part is that all the method calls as well as interface definitions will also be updated according to the new signature. As before you can preview changes before applying.
Reorder method parameters
Adding method parameters, removing them is fine. But what about re-ordering them? Don't worry. There is "Reorder Parameters" option that does just that. This option works only for methods with two or more parameters. When selected it opens a dialog as shown below:
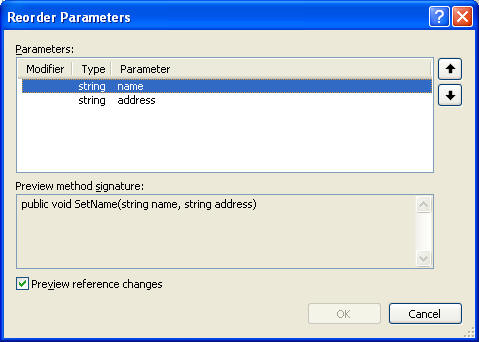
You can move the parameters up or down and see the preview as before. As with remove parameter option all the method calls automatically get updated as per the new order of parameters.
Summary
Refactoring is important and common requirement in many development scenarios. VS.NET 2005 provides necessary tools to quickly refactor your code and improve its overall organization, structure and readability.

